FMOD Unity Integration
FMOD: Unity Integration
Created by Daniel Dehaan, 2021-09-26
This document was written using FMOD Studio version 2.02.03 and Unity Editor version 2020.3.18f1 (Mac, Windows)
Unity Project Setup
-
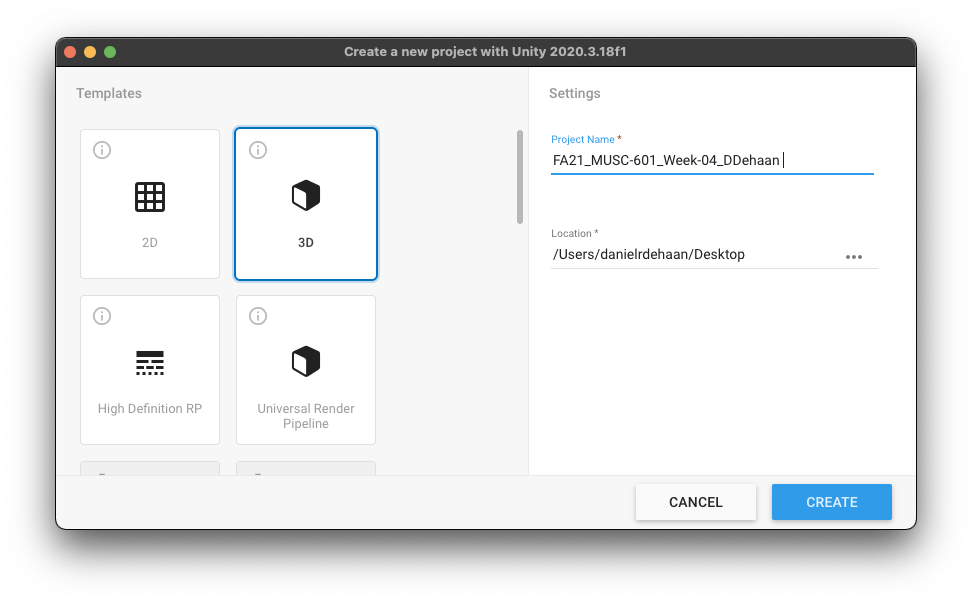
Create a new 3D Unity (URL) project and name it “FMOD Playground” (e.g. FA21_MUSC-601_Week-04_DDehaan).
-
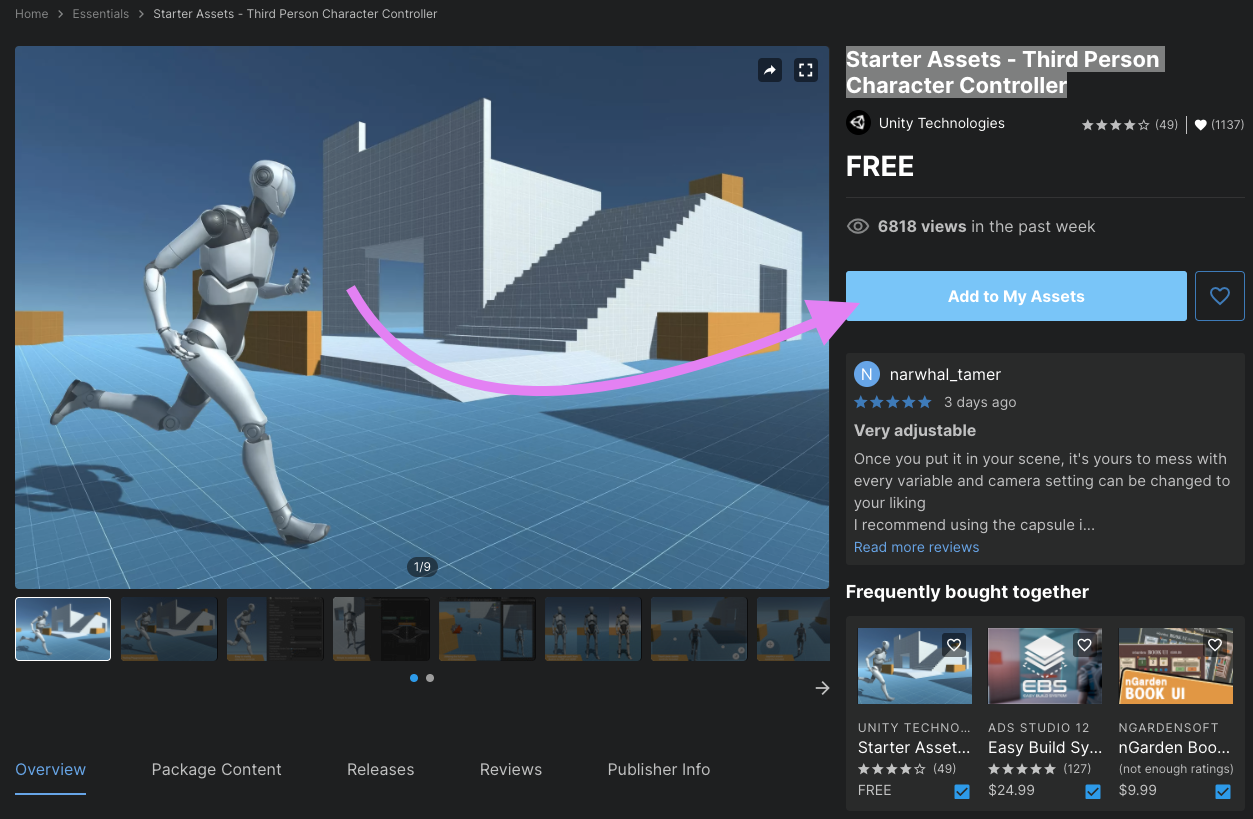
Import the Starter Assets - Third Person Character Controller.
-
After clicking the link above, click “Add to My Assets”.
-
Click “Open in Unity”.

-
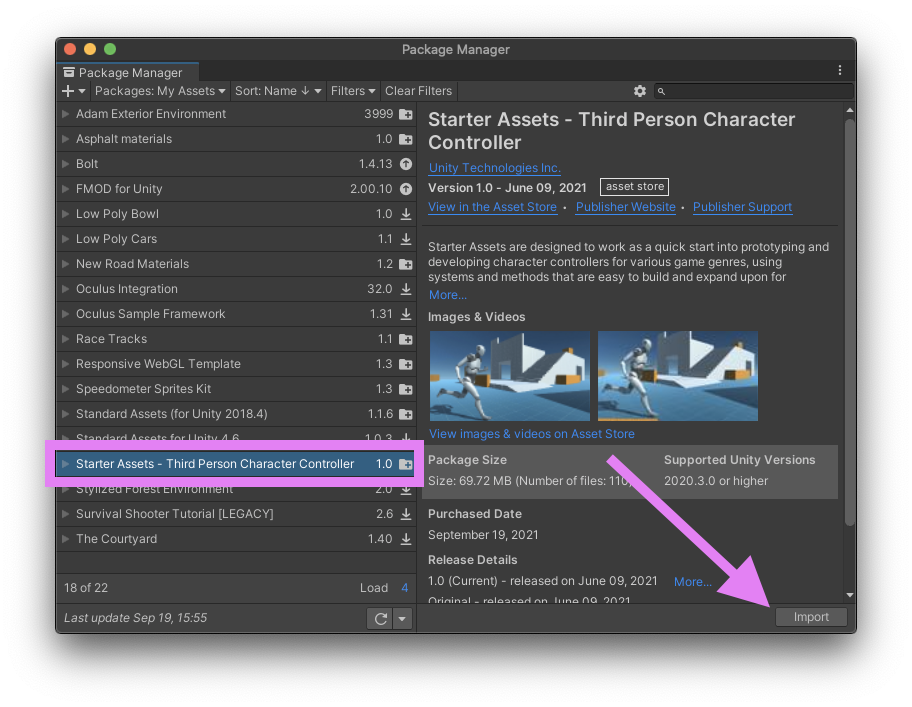
Make sure the Starter Assets - Third Person Character Controller package is selected and click import.
-
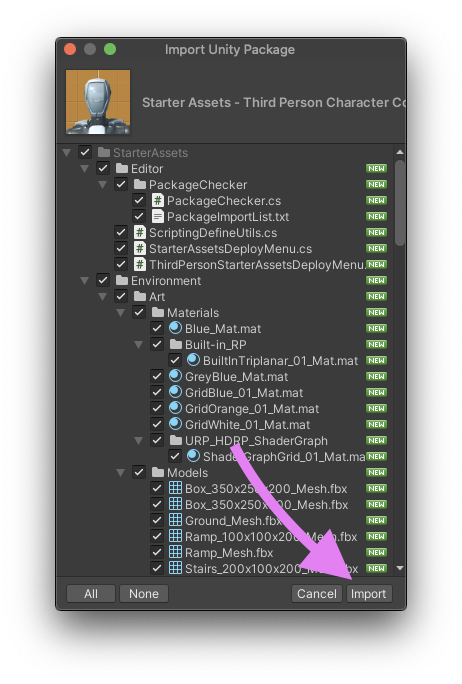
If a second import window appears make sure all the assets are selected and click “Import”.
-
-
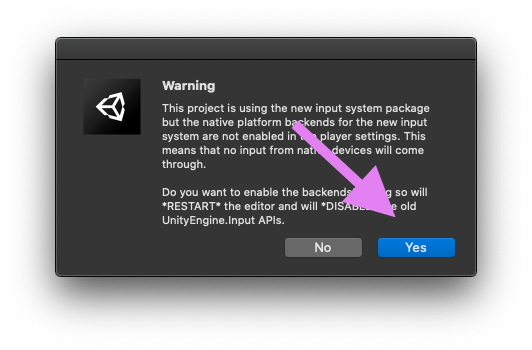
If you get a pop-up warning about this project using a new input system, click “Yes”.
-
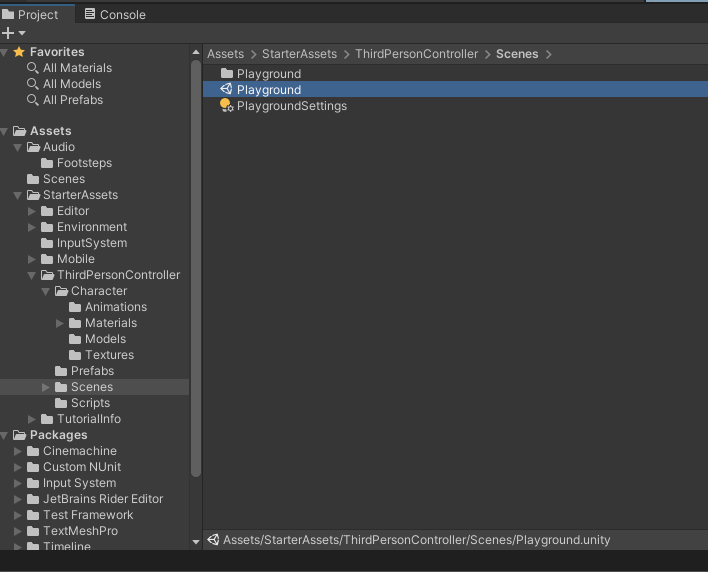
Once the import completes, and the Unity Editor has restarted, open the demo scene found in the Project window **by navigating to Assets > StarterAssets > ThirdPersonController > Scenes and double-click “Playground”.
-
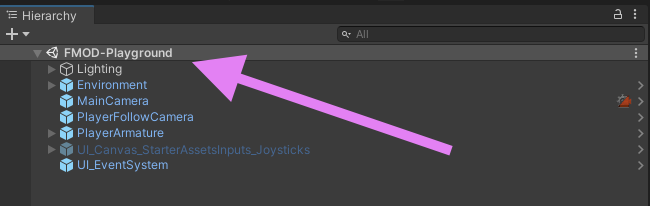
Save the current scene as “FMOD-Playground” in the Assets > Scenes folder by right-clicking on the top-level Playground Scene within the Project Hierarchy window and choosing Save Scene As…
-
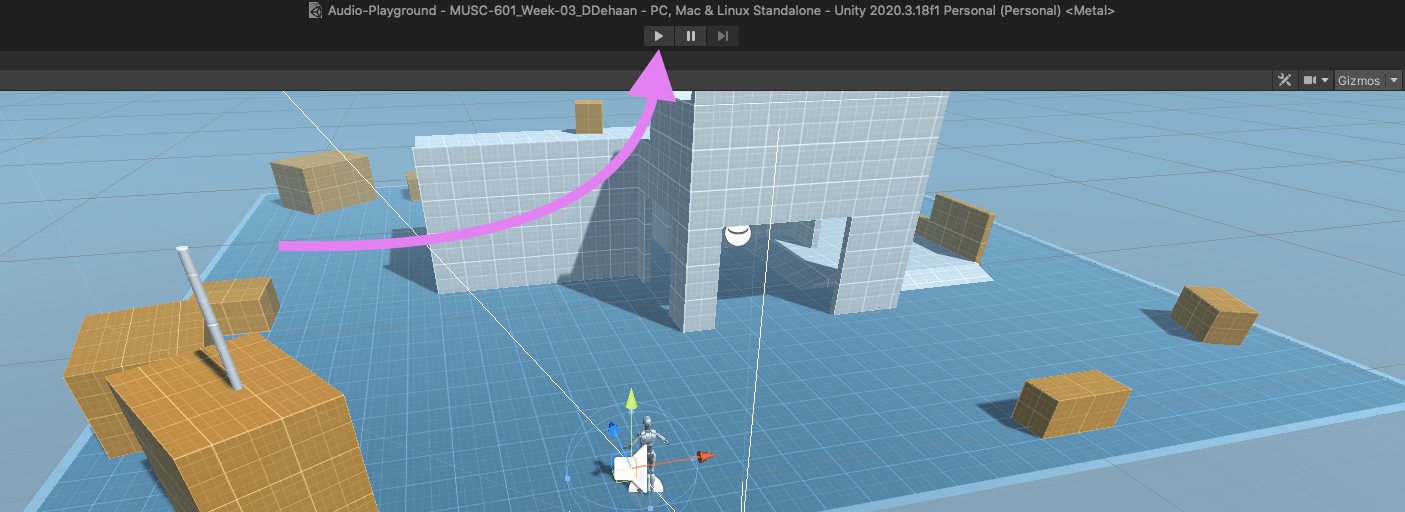
Test the scene by clicking the play button near the top of the Unity Editor window.
Integrating Unity with an FMOD Project
-
Go to FMOD.com/download and download both “FMOD Studio” and “FMOD for Unity” version 2.02.03
-
Install FMOD Studio and start a new project named “FA21_MUSC-601_Week-04_First Initial Last Name_FMOD-Project” (e.g. “FA21_MUSC-601_Week-04_DDehaan_FMOD-Project”).
-
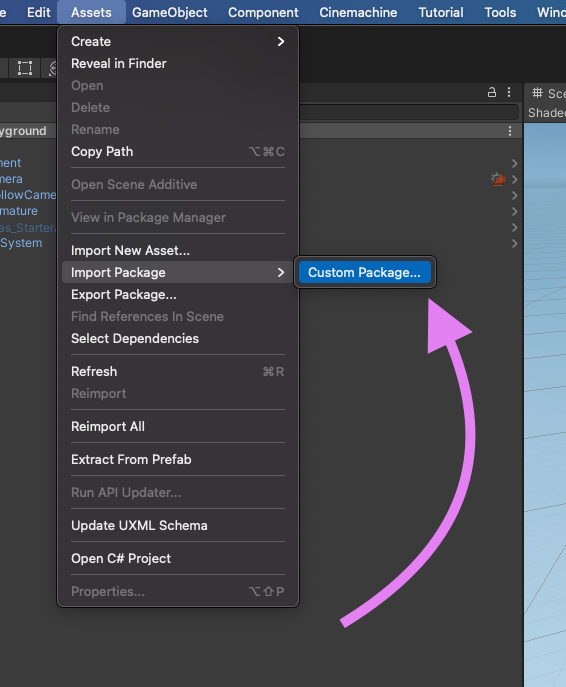
Back in the Unity Editor, from the Menu Bar select Assets > Import > Custom Packages… and then select the FMOD for Unity file you just downloaded.
-
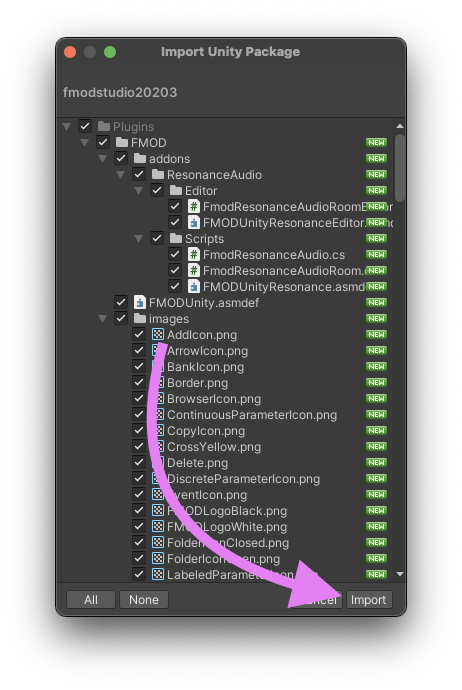
Then click “Import”.
-
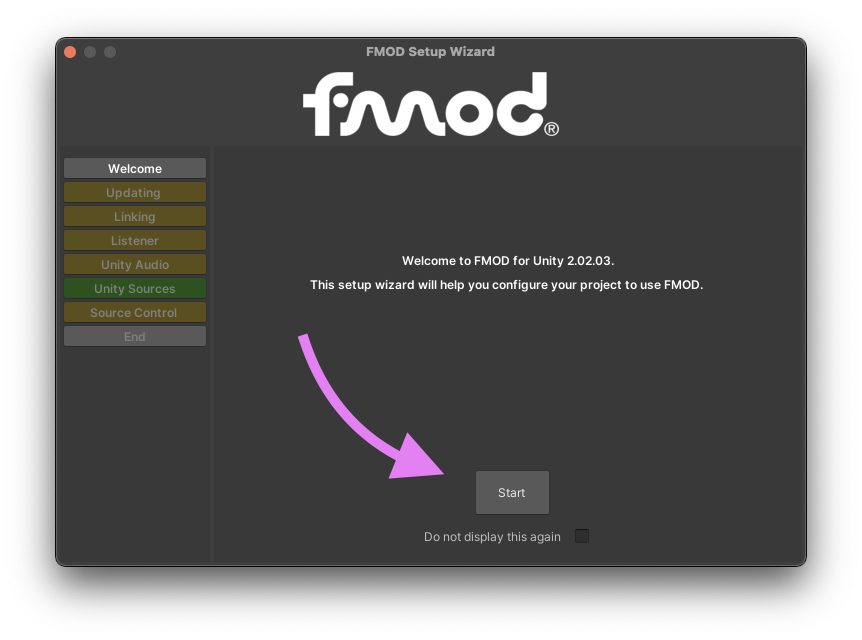
After the package has been successfully imported, a setup wizard will appear, click “Start.”
-
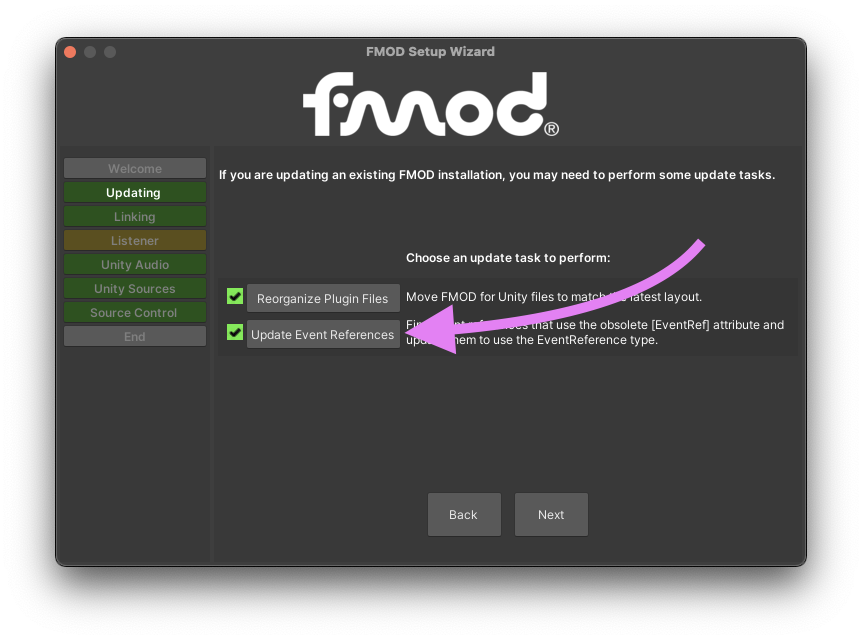
On the next screen confirm that “Reorganize Plugin Files” has a green checkmark next to it, then click to “Update Event References”.
-
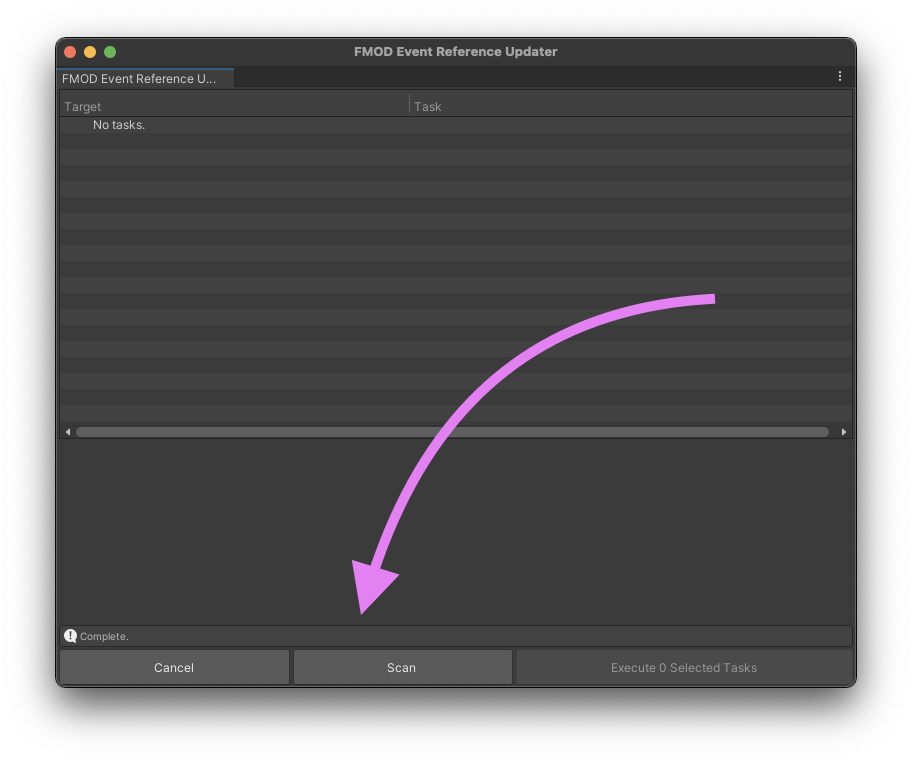
On the screen that appear, click “Scan”.
-
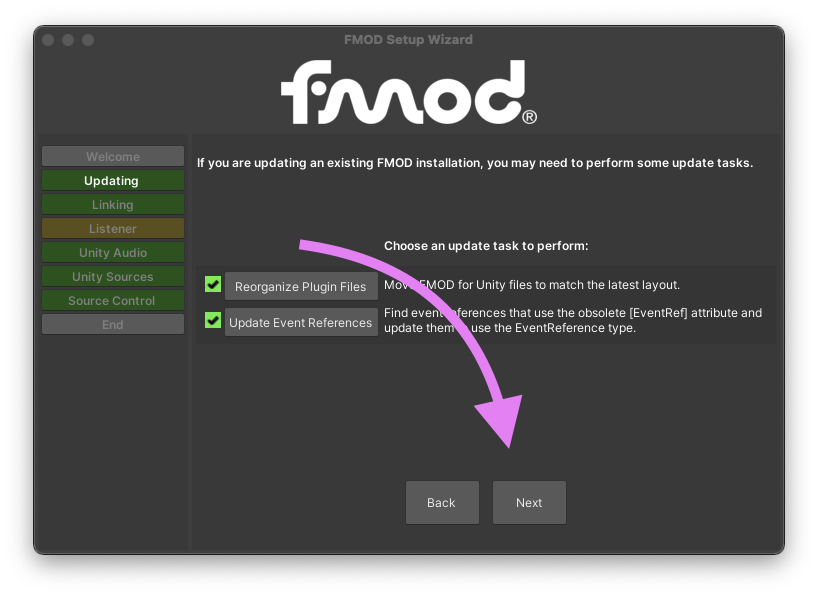
Once the scan completes, you may close the “FMOD Event Reference Updater” window and click the “Next” button in the “FMOD Setup Wizard” window.
-
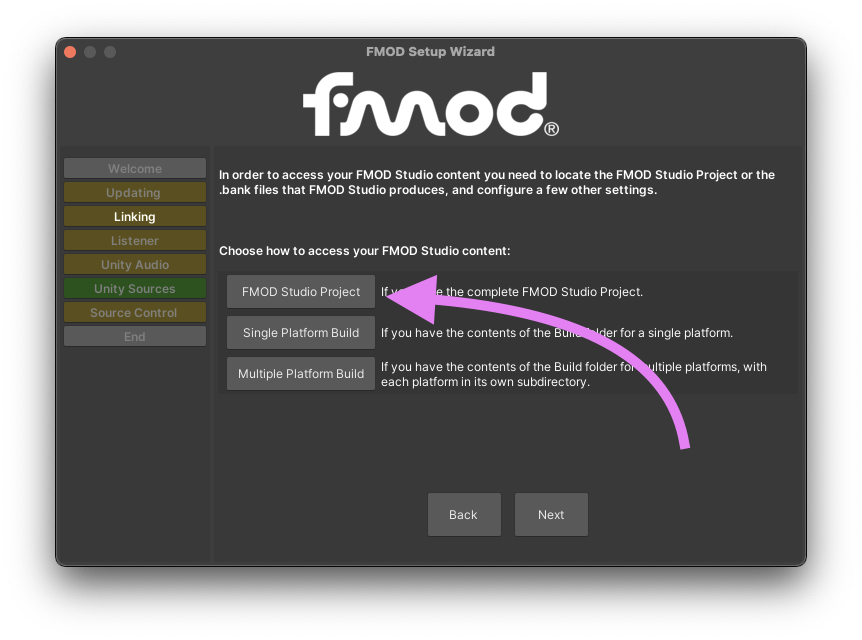
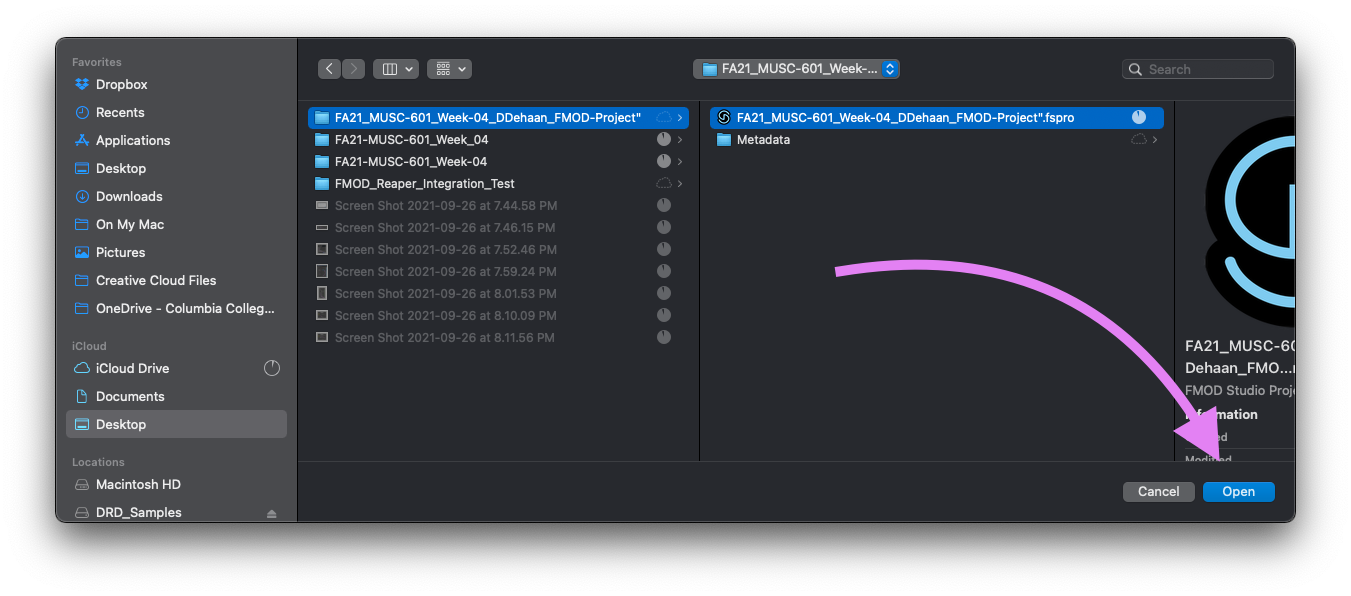
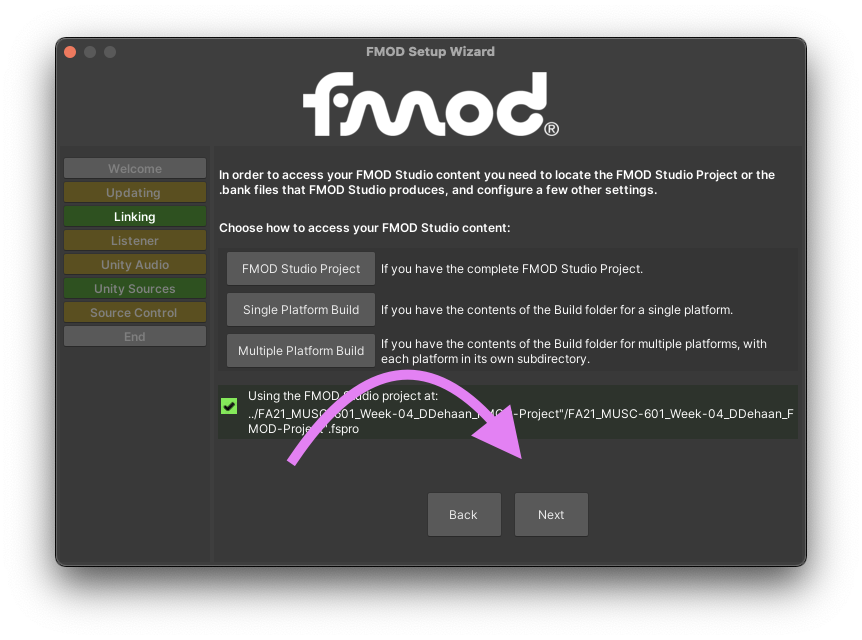
On the next screen, click “FMOD Studio Project” then navigate to the FMOD Project you just created and click “Open”.
-
Then click “Next”.
-
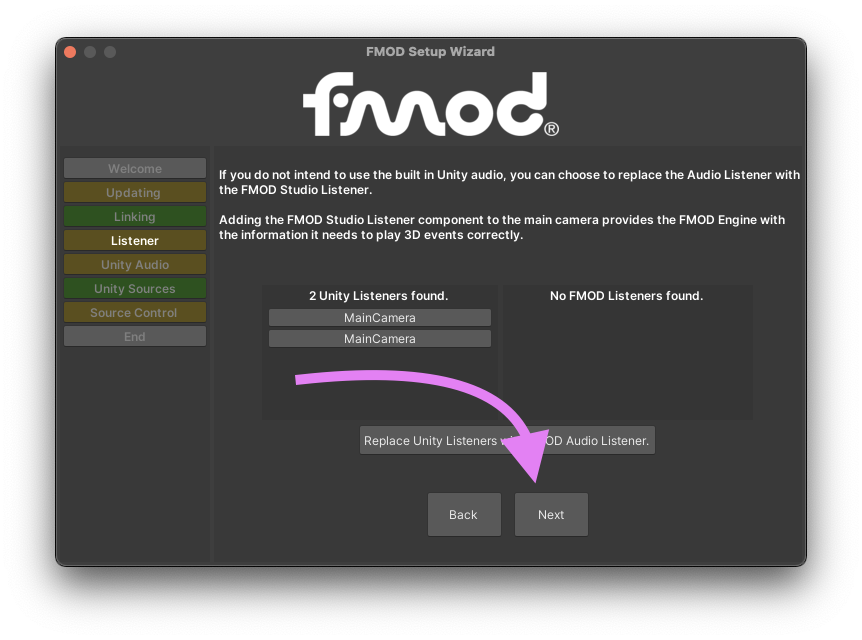
The next screen will prompt you to replace any native “Audio Listener” components with FMOD’s Audio Listener components. For now, just click “Next’. We will do this manually in just a moment.
-
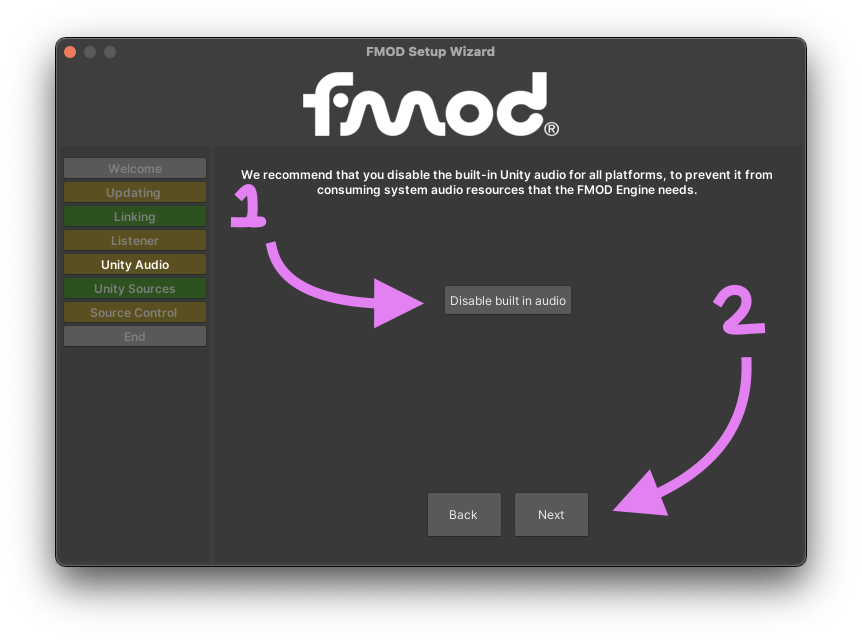
On the next screen, click the button to “Disable built in audio”. Then click “Next”.
-
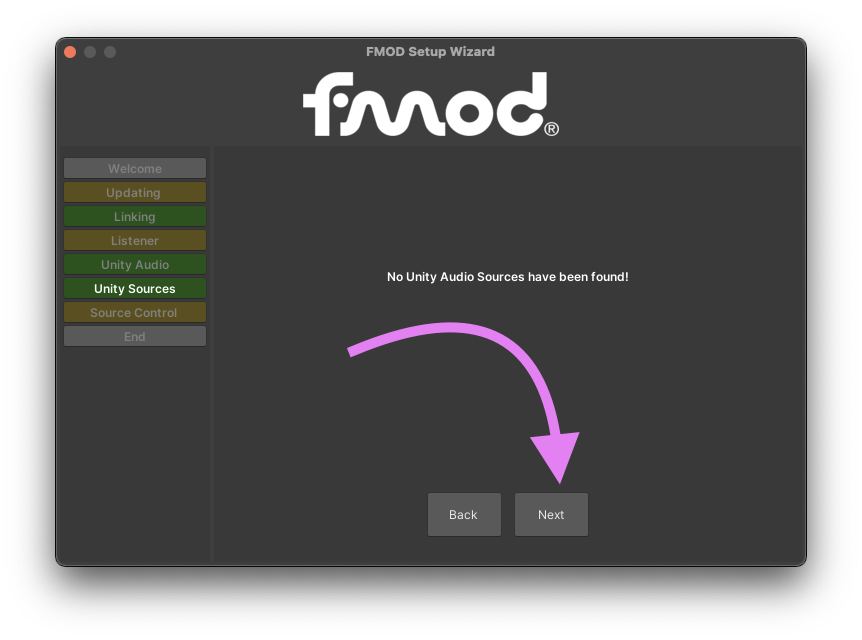
On the next screen, confirm that no audio sources should have been found and click “Next”.
-
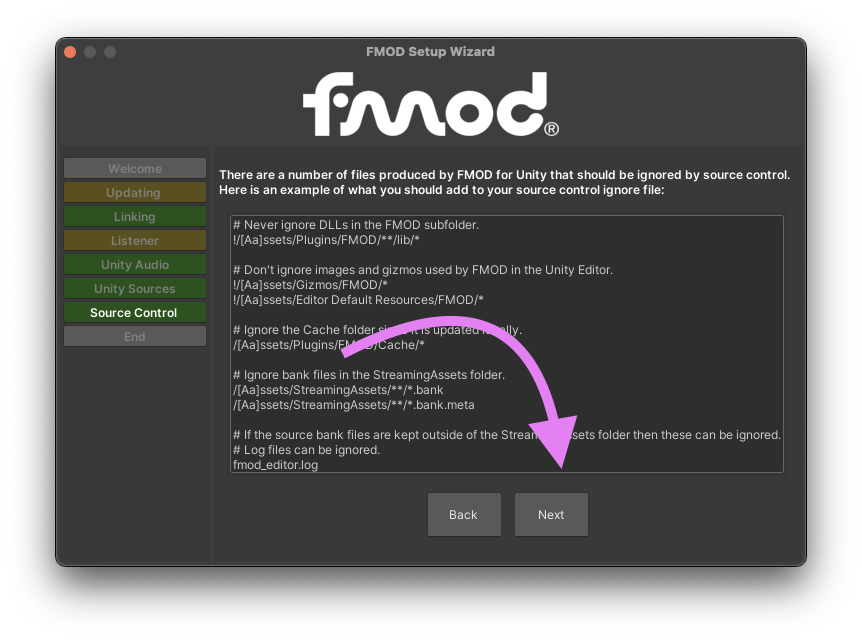
The final screen provides information about what you should do if you are working on a collaborative team that uses a system for managing changes to their shared files. We are not, so we can just click “Next”.
-
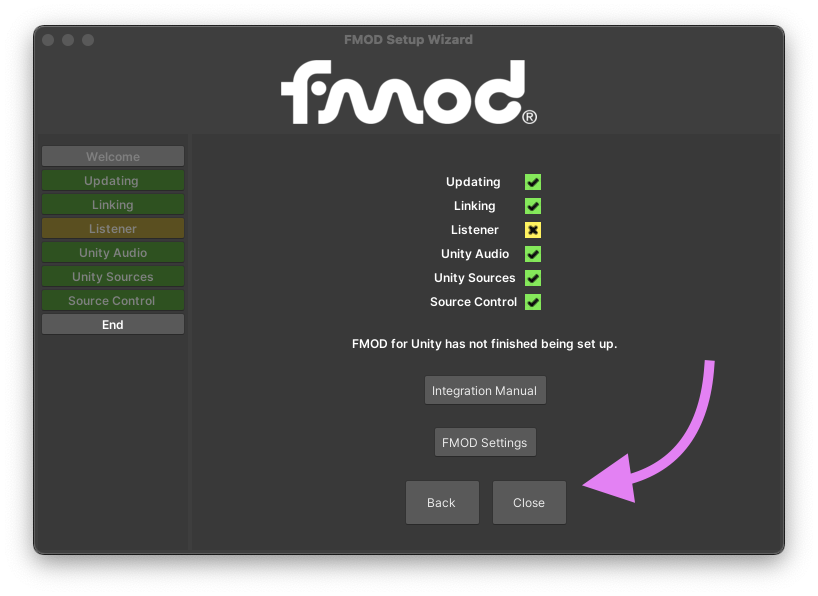
With everything but the Listener step completed, you may now close the FMOD Setup Wizard window.
-
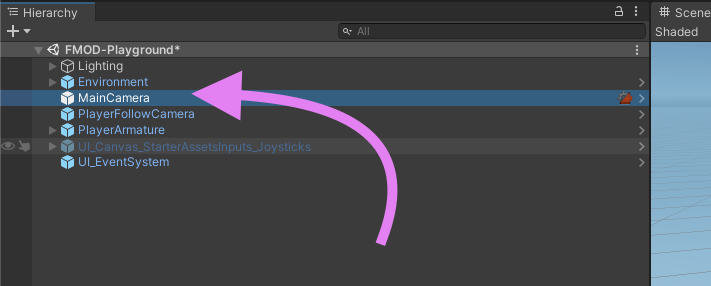
Lastly, we need to replace the native Audio Listener with the FMOD Studio Listener component. To do this, select the MainCamera game object in the Hierarchy window for the FMOD-Playground scene.
-
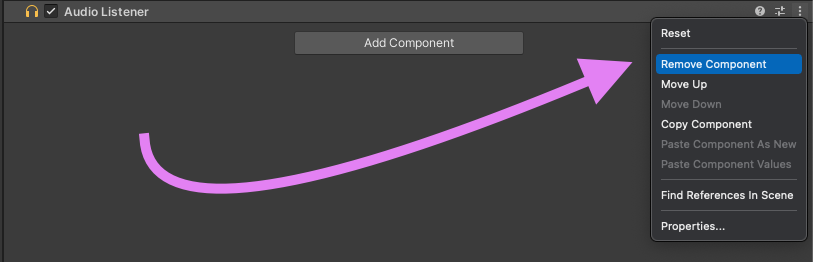
Then, over in the inspector window, find and remove the “Audio Listener” component.
-
Finally, add a new “FMOD Studio Listener” component to the MainCamera game object.
-
That’s it! You have now successfully integrated Unity and FMOD.
Adding Background Music
-
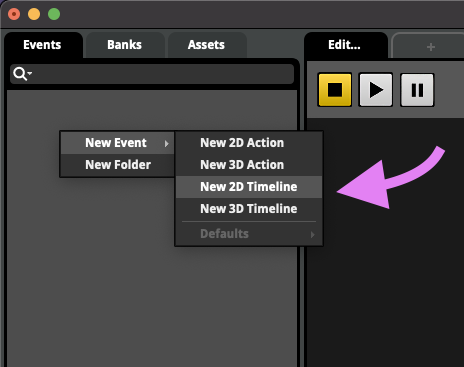
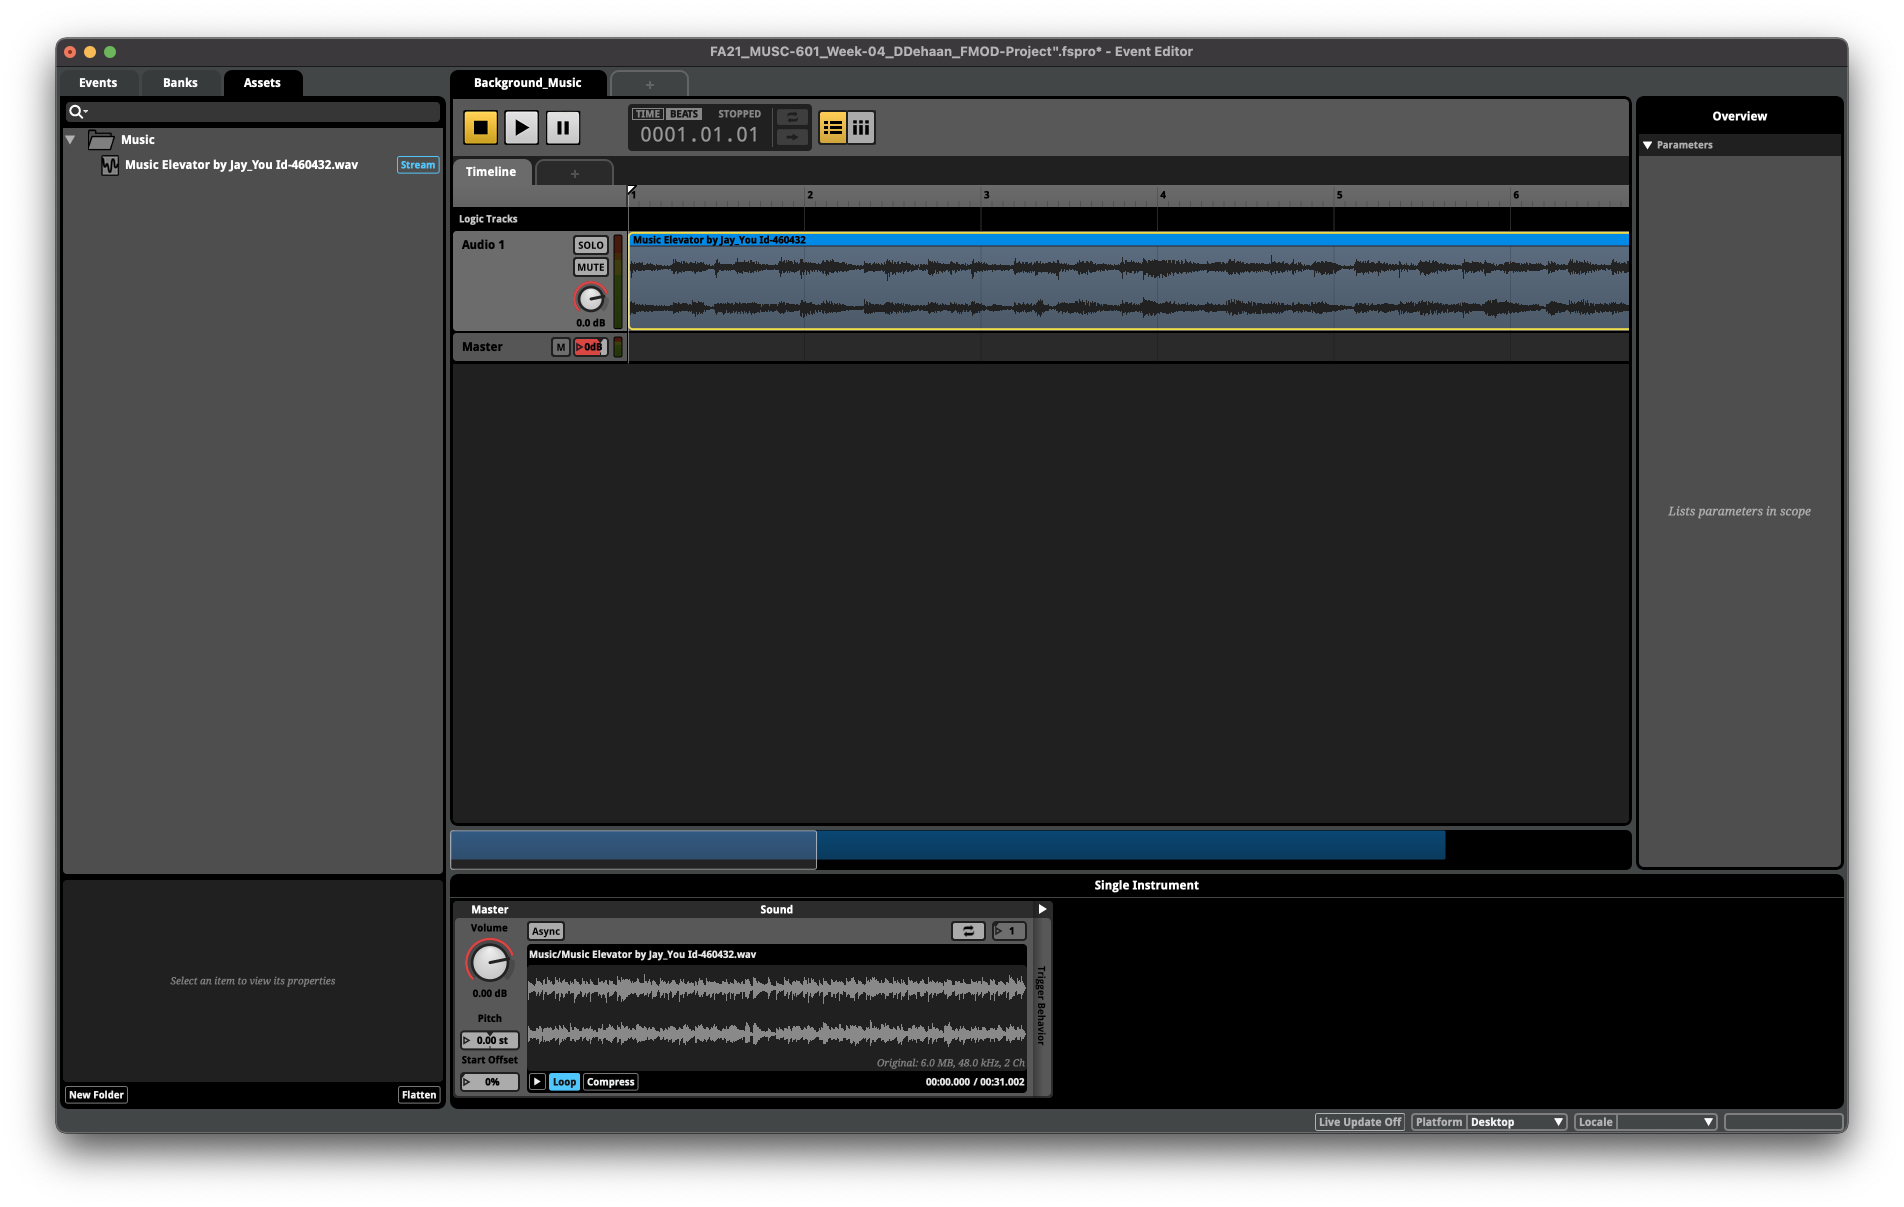
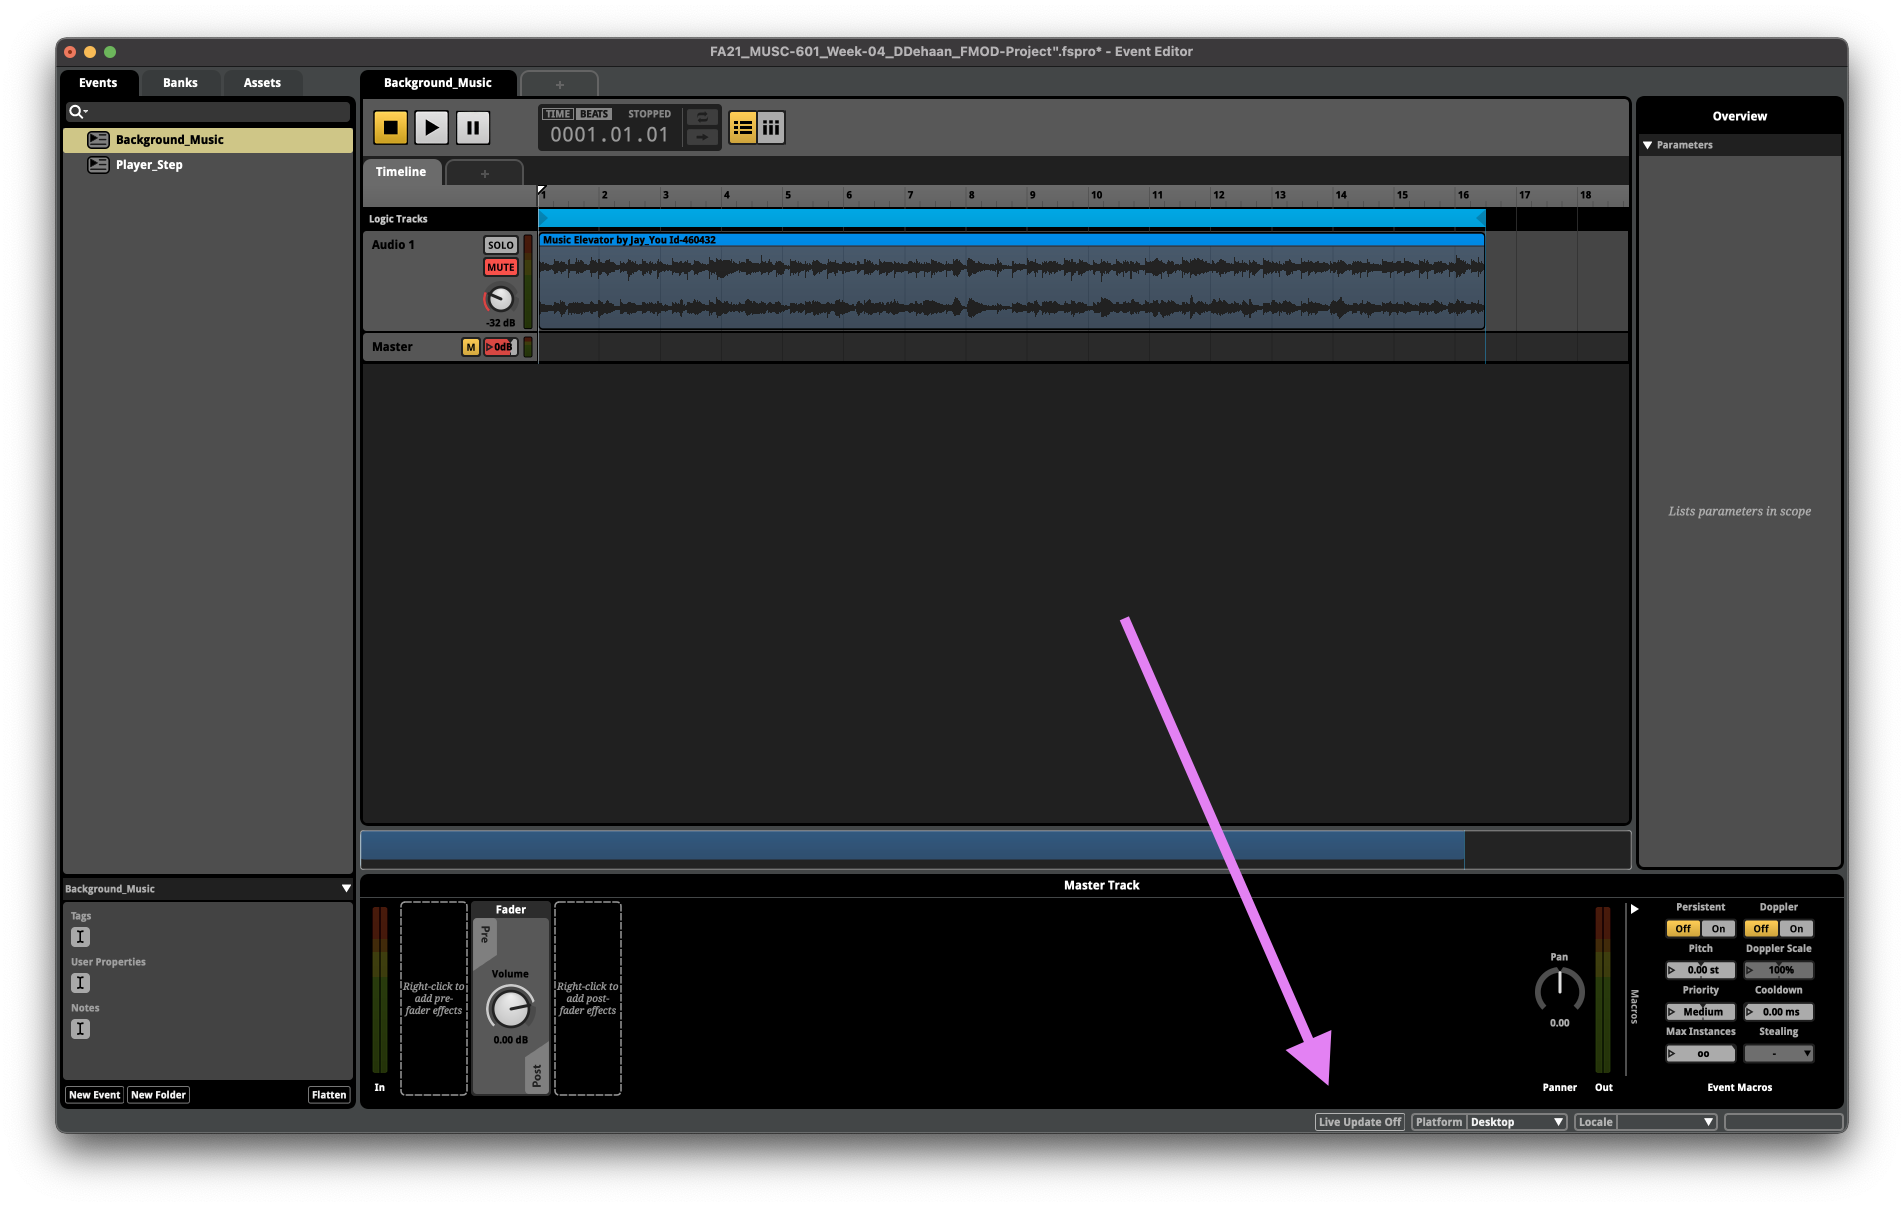
In your FMOD Project, create a new 2D Timeline Event and call it “Music_Background”.
-
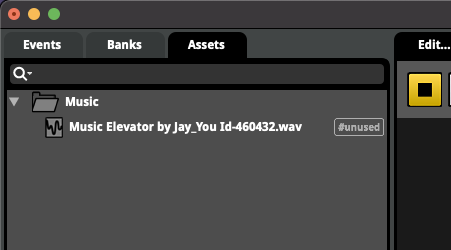
Switch to the Assets tab and drag-and-drop your background music file into a new folder called “Music”.
Music Elevator by Jay_You Id-460432.wav.zip
-
Then drag-and-drop that asset onto the Background_Music even you just created.
-
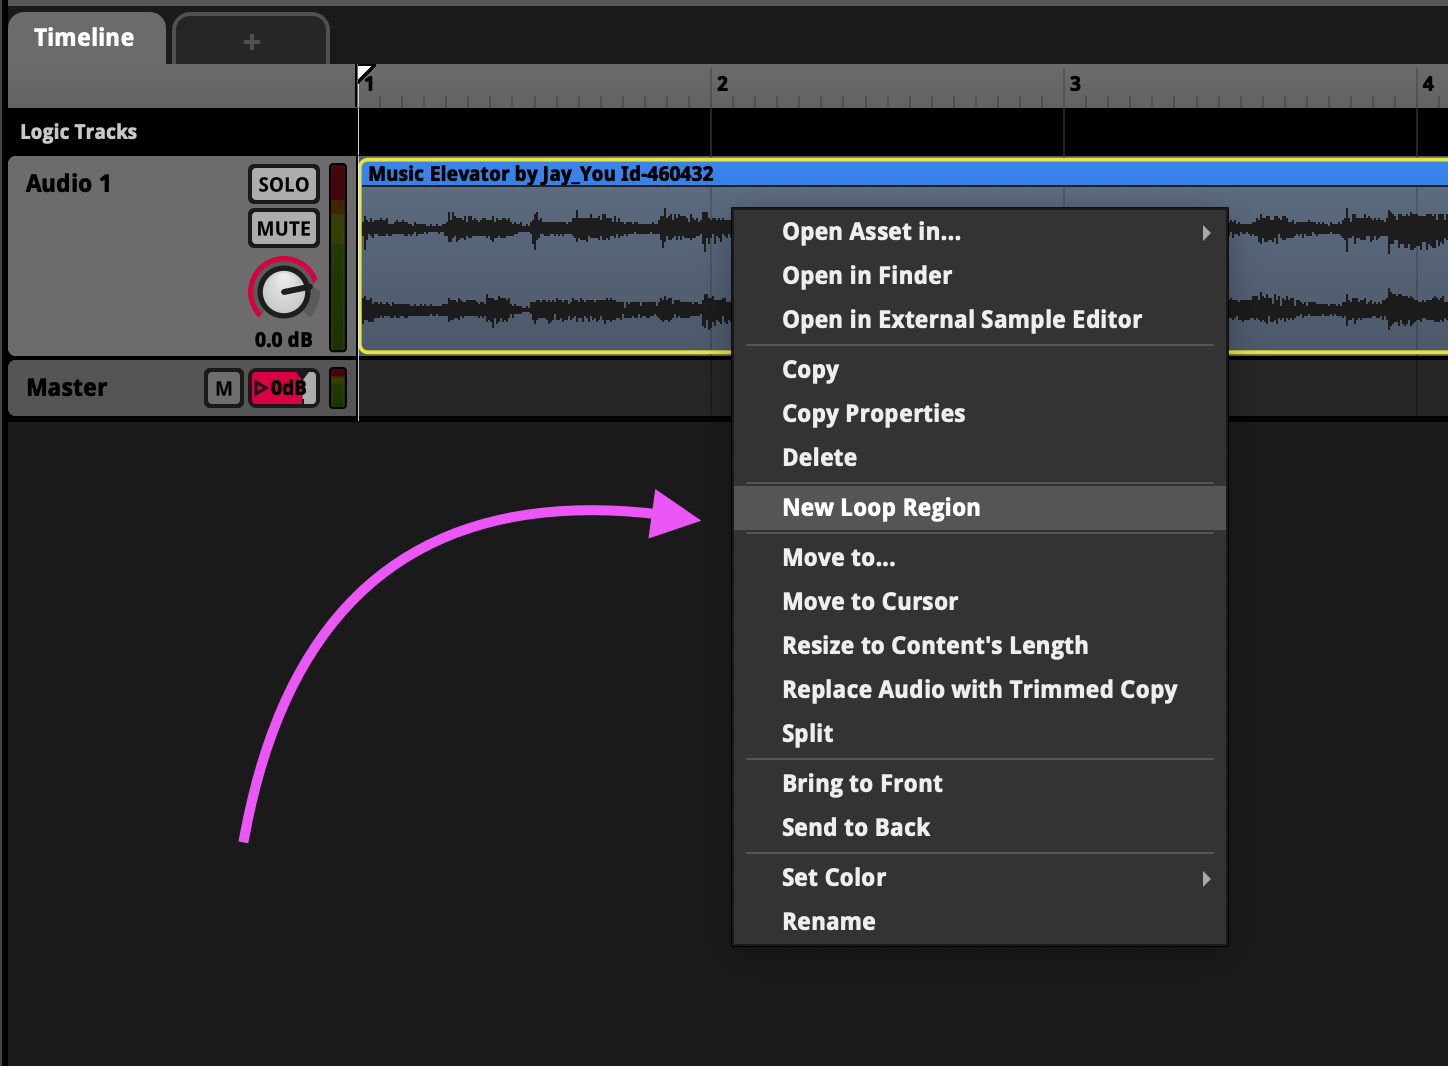
Loop the full duration of the audio asset by right-clicking on the waveform and selecting “New Loop Region”.
-
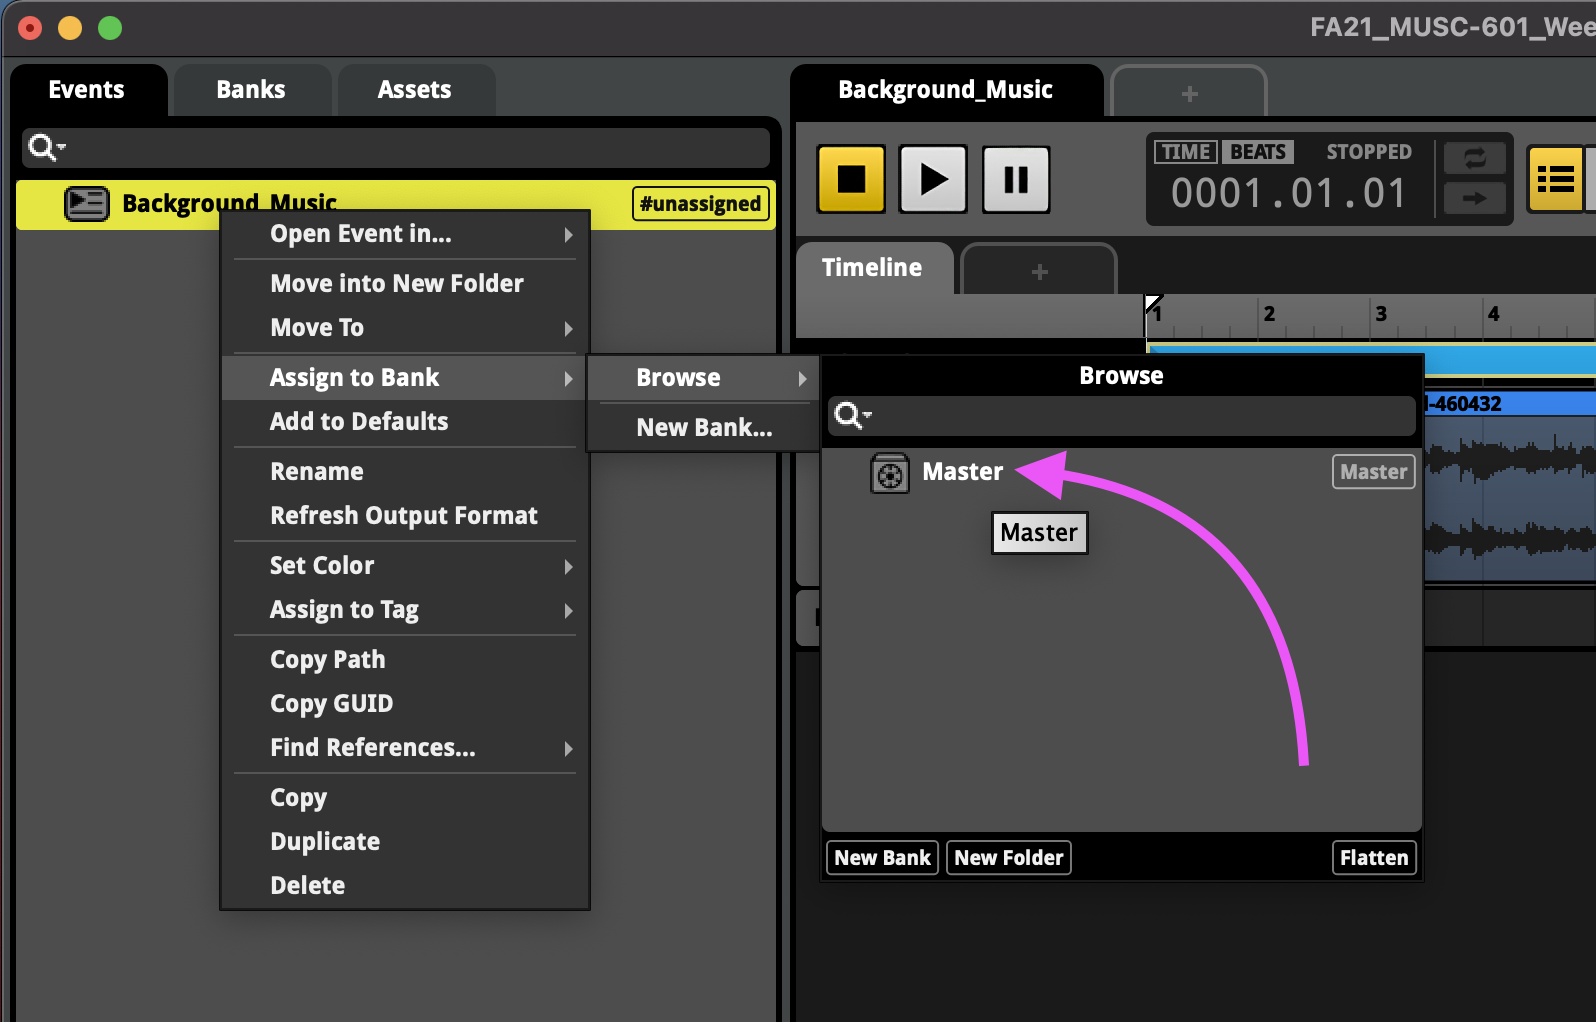
Before this event and its associated assets become available to our Unity project, we have to first assign the event to a Bank, and build the FMOD resource that will be include in the Unity project. To do this, right-click on the “Background_Music” event and assign it to the “Master” bank.
-
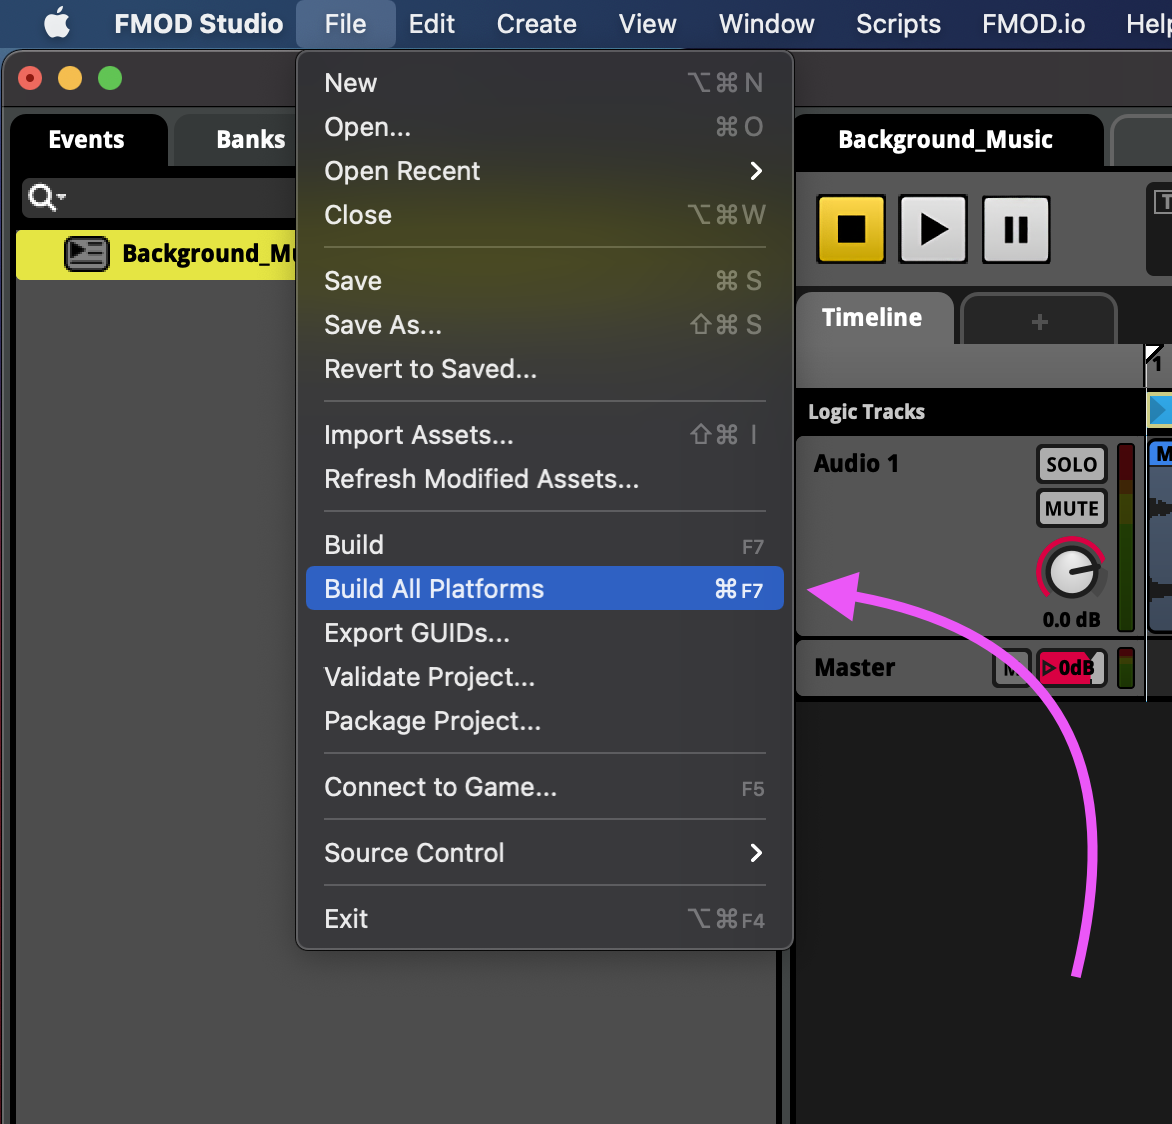
Then, from the Menu Bar, select File > Build All Platforms

-
Then save the FMOD project.
-
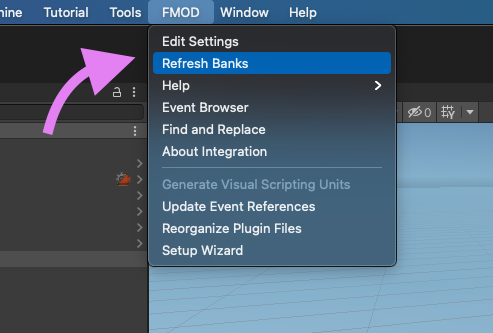
Back in Unity, select FMOD in the Menu Bar and choose “Refresh Banks”.
-
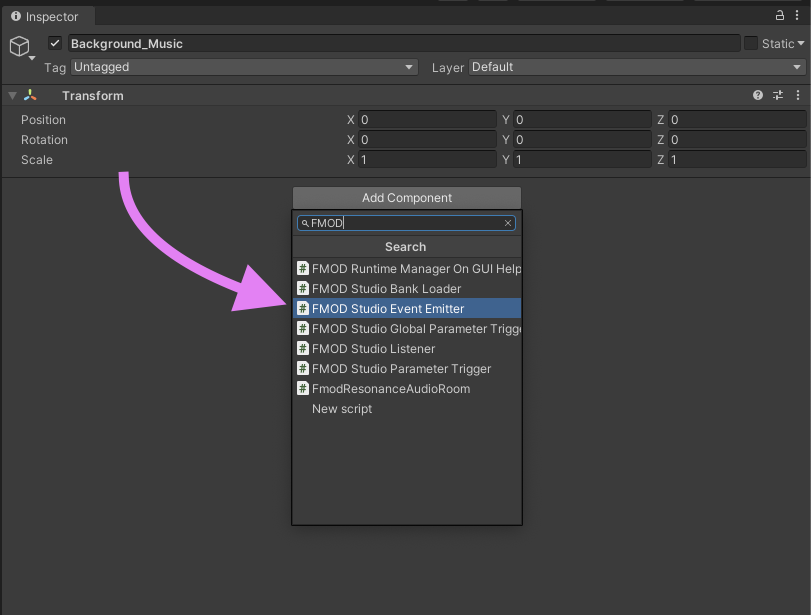
Next, add an empty game object to the FMOD-Playground scene and call it “Background_Music”.
-
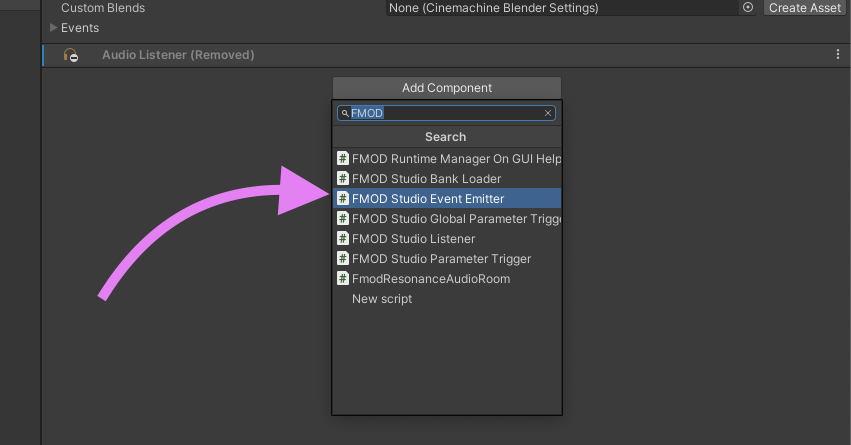
Select the new “Background_Music” game object and add an “FMOD Studio Event Emitter” component.
-
In the new “FMOD Studio Event Emitter” comment set the
- Play Event = “Object Start”
- Stop Event = “Object Destroy”
- Event = “event:Background_Music”

-
Finally, click the “Play” button to test for your background music.
Adding Footsteps
-
Navigate to Assets > Standard Assets > ThirdPersonController > Character > Animations > Locamotion—Walk_N.anim
-
Expand the Events section.
-
Move the model into a good position to see the feet.
- Option/Alt + click + drag = turn camera
- Click+Drag = slide camera
- Option/Alt + mouse wheel up/down to zoom in/out
-
Drag on Play Ruler (above model view) to find the first footfall and add a “Step” event by clicking the Add Event button.
-
Repeat the previous step for all footsteps.
-
When a “Step” event has been added to all animated footsteps, click “Apply”.
-
Select the PlayerArmature game object in the Hierarchy window, and, if one does not already exist, add an Audio Source component.
-
Add a new Script Component named “Audio_Trigger_Animation_Event_Step” to the PlayerArmature game object.
-
In the Project window, create a new Scripts folder inside the main Assets folder and move your new Animation_FMOD_Event_Trigger **inside of the new folder.
-
Open new Script in Visual Studio.
-
In Visual Studio edit the script so it matches the one shown below:
using System.Collections; using System.Collections.Generic; using UnityEngine; public class Animation_FMOD_Event_Trigger : MonoBehaviour { public FMODUnity.EventReference fmodEventStep; private void Step() { FMODUnity.RuntimeManager.PlayOneShot(fmodEventStep); } } -
Save and close the script.
-
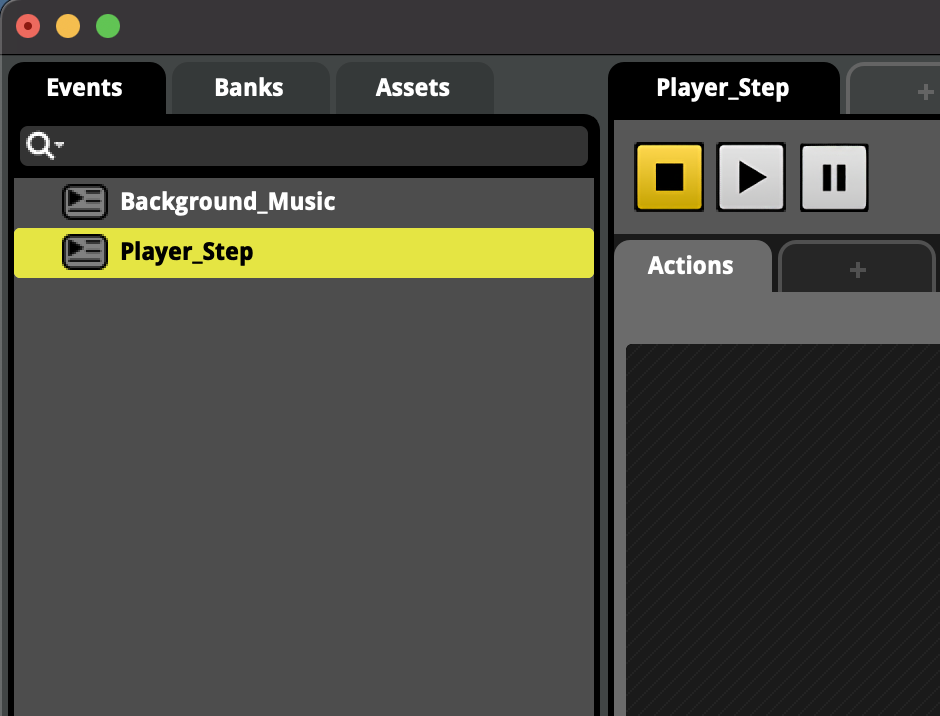
Back in FMOD Studio, create a new 2D Action called “Player_Step” and assign it to the Master bank.
-
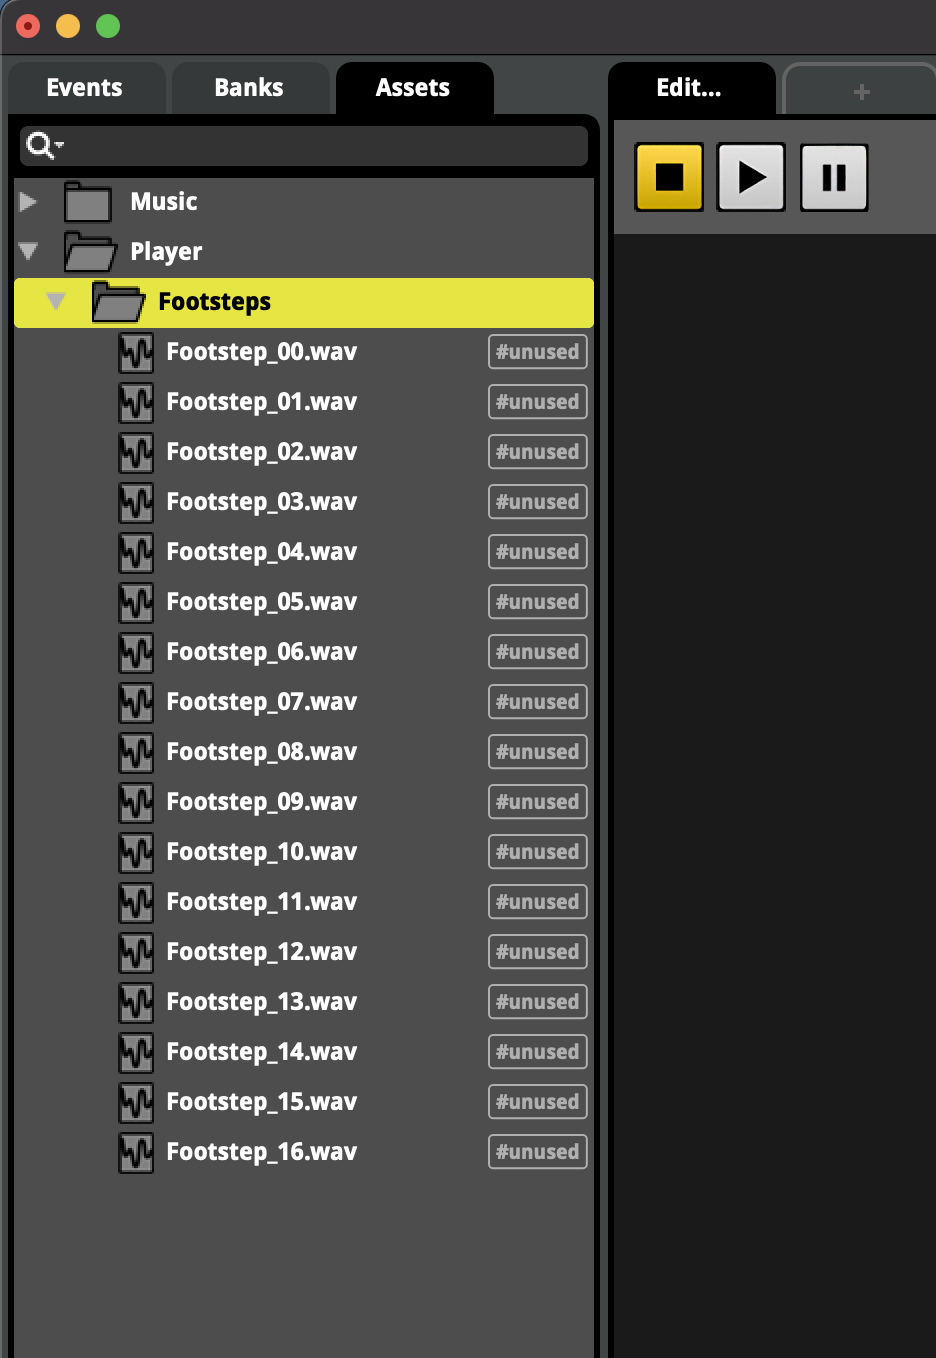
In the Assets tab, drag-and-drop the footstep audio files into a new folder called “Footsteps” inside of another new folder called “Player”.
-
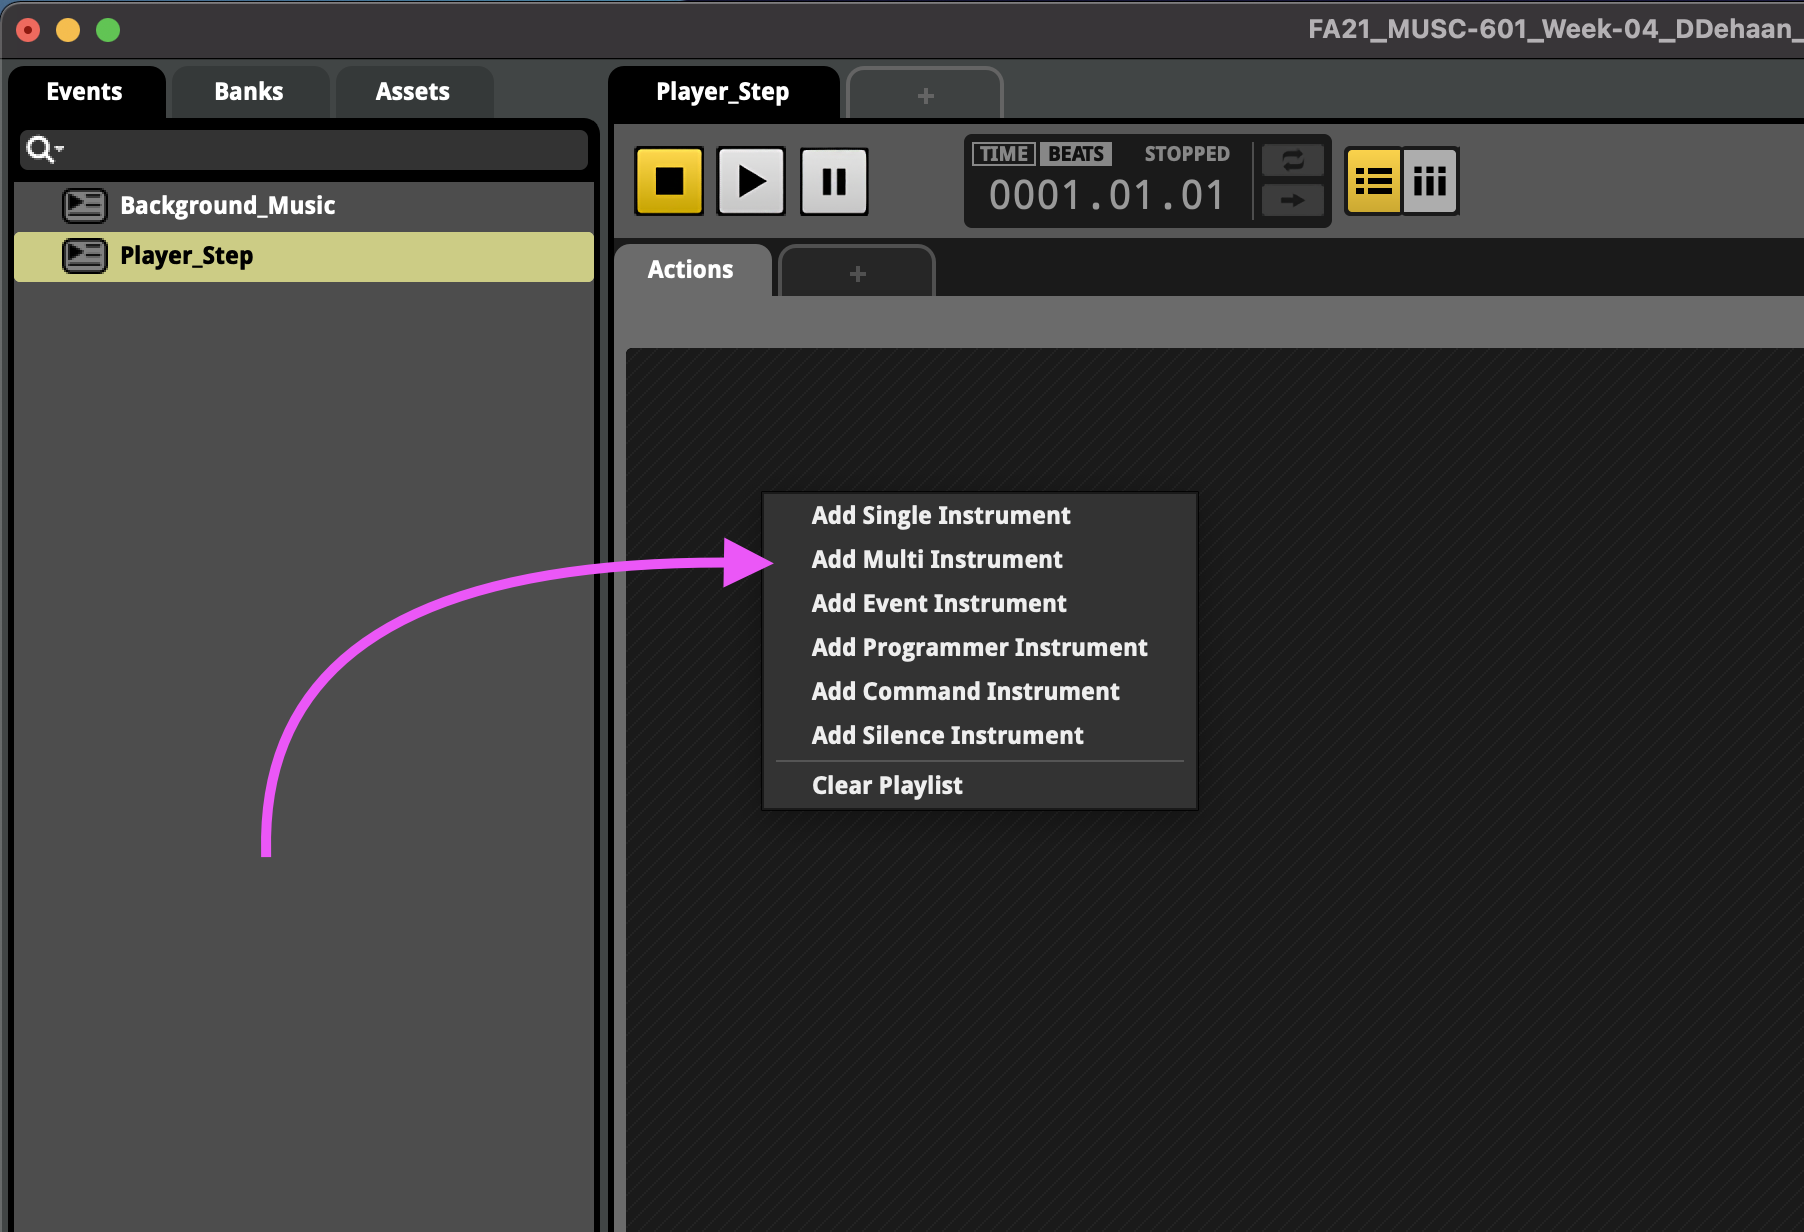
Then, back inside the new Player_Step event, right-click and add a new Multi Instrument.
-
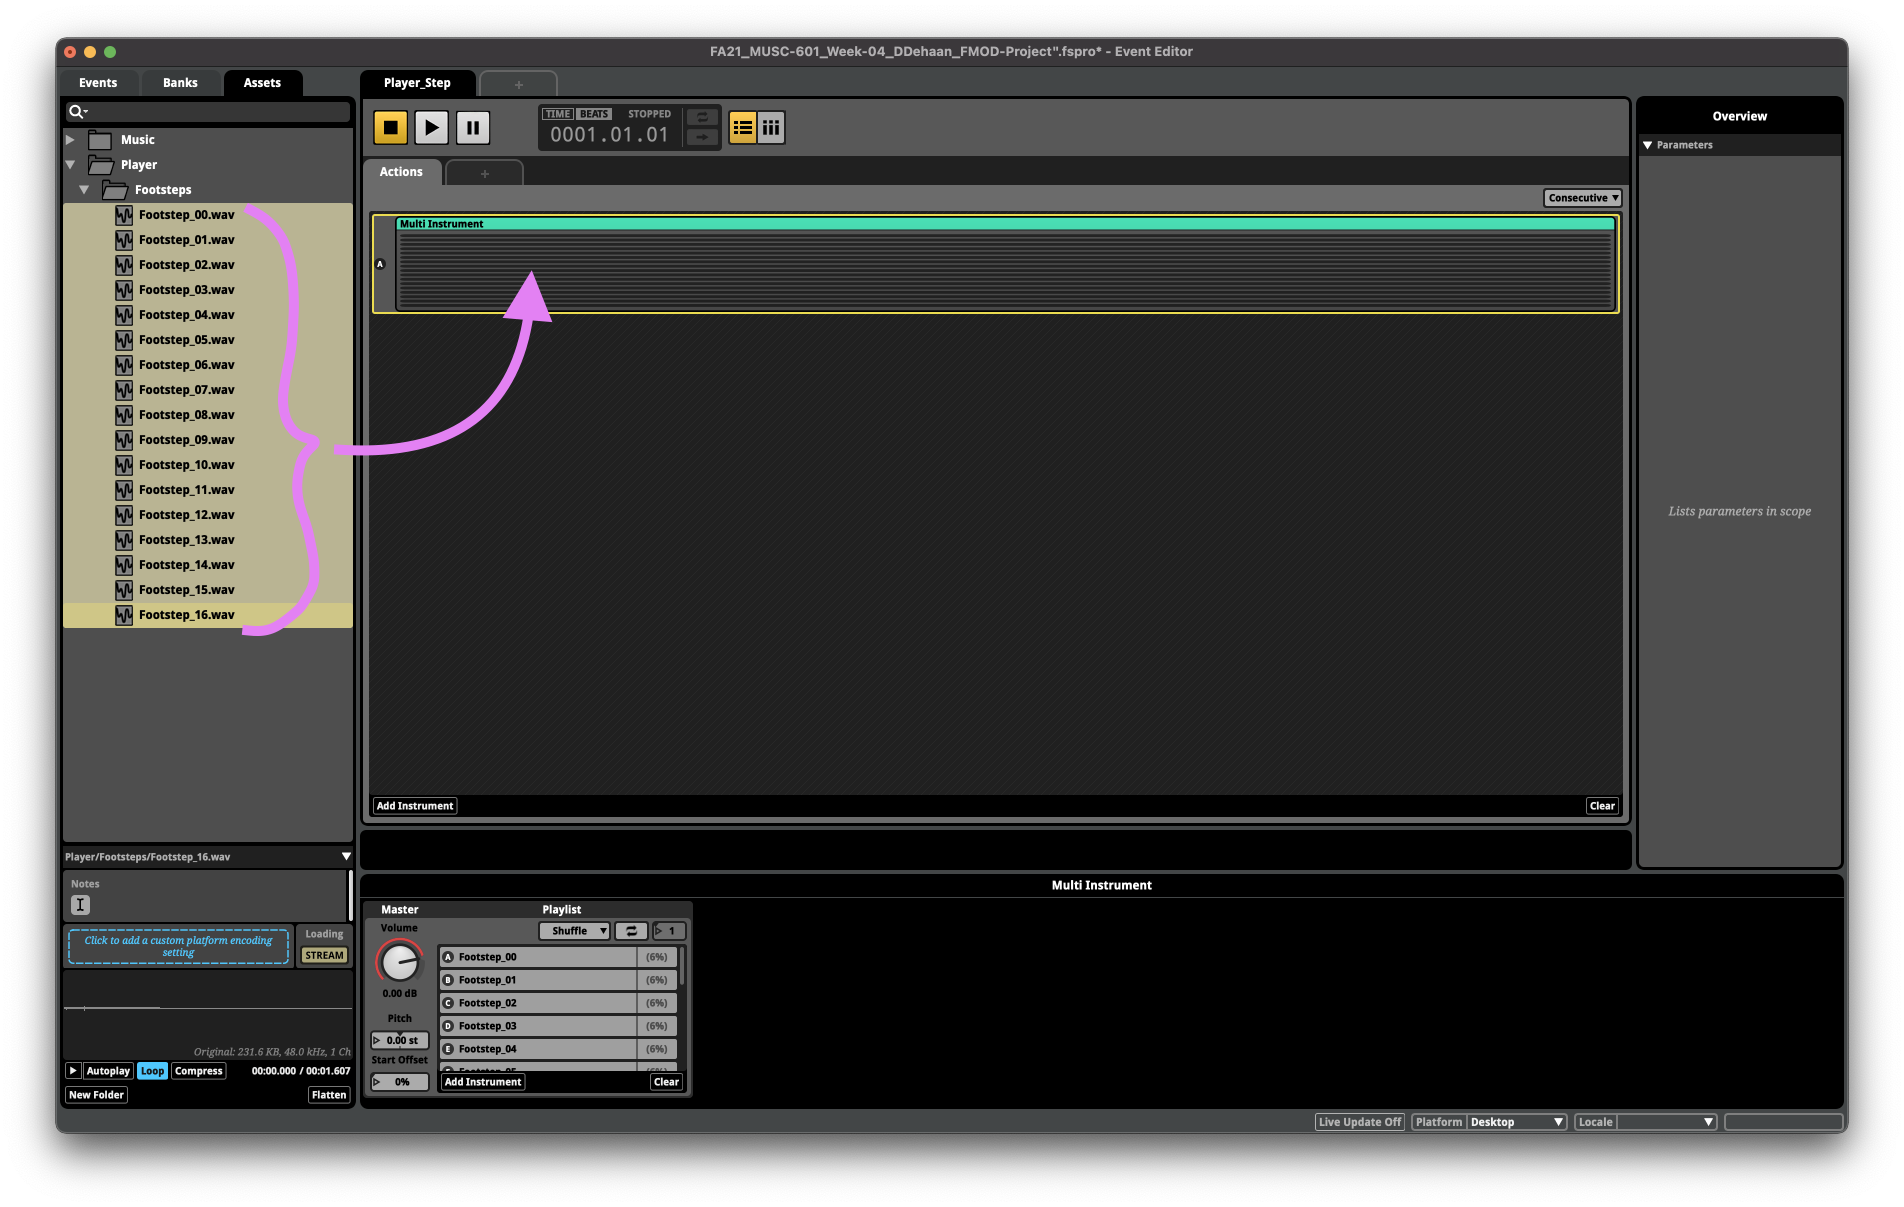
Next, drag-and-drop all the footstep assets inside the new Multi Instrument.
-
Test the event in FMOD by clicking the play button a few times. You should hear a different footstep on each click of the play button.
-
Before testing everything back in Unity, be sure to Build For All Platforms and save the FMOD project.
-
Back in Unity, refresh the FMOD Banks.

-
Return to the Animation_FMOD_Event script component in the inspector window and select the new Player_Step event for the FMOD Event Step parameter.

-
Finally, play the game in Unity and see if you can hear the footsteps.
Controlling FMOD Parameters
FMOD Parameters could be controlled by almost anything in Unity, but to keep things simple we’ll setup some Box Triggers to trigger specific FMOD parameter values.
Box Triggers are invisible game objects within the scene that are used to trigger events whenever a player moves through them.
Let’s create a box trigger so that whenever our player walks through the short tunnel the background music fades out, and an owl “hoots” randomly for as long as the player remains inside the tunnel.
-
Begin by bringing the short Tunnel_Prefab game object into focus by
- Selecting it in the Hierarchy window under Environment > Greybox > Tunnel_Prefab
- Then hover the cursor over the Scene window and pressing the ‘f’ key
-
Right click on the Tunnel_Prefab object in the Hierarchy window and create a new 3D Object > Cube game object named “Box_Trigger”.
-
With the new Box_Trigger object selected in the Hierarchy window, navigate to the Inspector widow and adjust all of the following parameters to…
-
Transform > Position x = 0, y = 0, z = 1.25
-
Transform > Scale x = 2.5, y = 6, z = 2.5

-
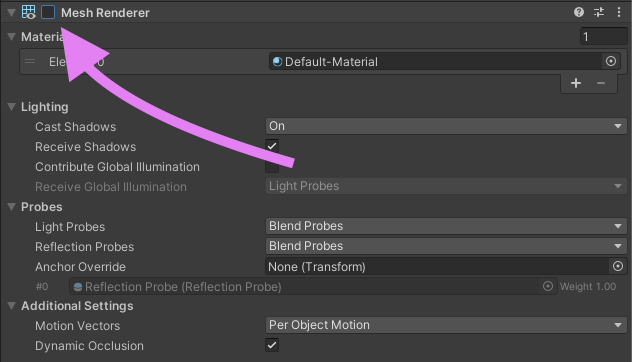
Disable its Mesh Renderer
-
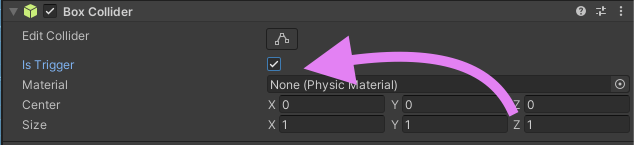
And enable the *Box Collider’s ‘*Is Trigger’ option.
-
-
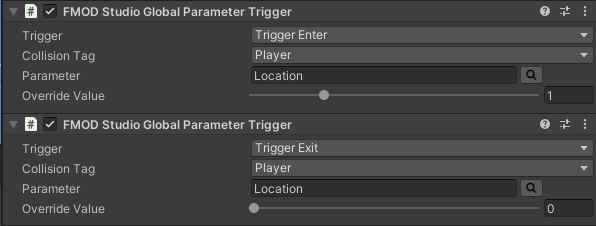
With the Box_Trigger game object still selected in the Hierarchy window, add a two “FMOD Studio Global Parameter Trigger” components. The first will set the Location parameter’s value to 1 when the player enters the box trigger. And the second will set the Location parameter’s value back to 0 when the player exits the box trigger.
-
Now test to see the parameter’s value changes when the player moves in and out of the box trigger.